![]() Azaleas and rhododendrons are in their glory now. Personally, I find them hard to resist. If you are looking to add to your collection or begin a new one, a great place to start is at, the American Rhododendron Society (ARS) Show & Sale. It will be held from 9 a.m. to 3 p.m. Sat., May 27, at the Holy Spirit Lutheran Church, 2205 Old Liberty Rd., Eldersburg, MD. The
Azaleas and rhododendrons are in their glory now. Personally, I find them hard to resist. If you are looking to add to your collection or begin a new one, a great place to start is at, the American Rhododendron Society (ARS) Show & Sale. It will be held from 9 a.m. to 3 p.m. Sat., May 27, at the Holy Spirit Lutheran Church, 2205 Old Liberty Rd., Eldersburg, MD. The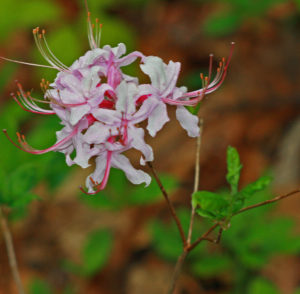 Mason-Dixon Chapter of the ARS will host the sale.
While the society doesn’t specifically focus on natives, they form an important component of rhododendrons.
“Plants native to eastern North America form the basis for many of the hybrids in three of the four major areas of rhododendrons: small-leaved (or lepidotes) and large-leaved (or elepidote) rhododendrons, and deciduous azaleas (where they are the major contributors to modern hybrids),” Ray Smith, past president, Mason-Dixon Chapter wrote me recently.
“Evergreen azaleas a re strictly from various parts of Asia,” he said. For information on natives, Don Hyatt’s website offers useful information: http://www.donaldhyatt.com/
Just purchased a rhododendron or azaleas? Ed. Reiley’s article will talk you through the planting process:
Transplanting Container-Grown Rhododendrons
By Ed. Reiley
Most plants, including rhododendrons, grow better and remain healthier in soils high in organic matter (10-40%).
For rhododendrons, an amended area at least 4 feet across and no deeper than 8 inches is required for an individual rhododendron. Amending a small planting hole is not recommended. Dig in 2-3 inches of equal parts of fine pine bark and sphagnum peat moss to a depth of 8 inches. Do not dig in hardwood bark.
Problems encountered in transplanting are:
- Container soilless potting mixes dry out rapidly in the landscape, killing roots.
- Plant roots do not quickly leave the root ball and extend out into the soil where moisture is available.
- Planting site is too wet.
Solutions:
- Add organic matter to the soil as explained above to encourage root extension and improve soil drainage.
- Physically remove the potting mix from around roots and extend roots out of existing root ball at least inches immediately prior to planting. Protect roots from sun and wind so they do not dry out.
- Raise beds 12 to 18 inches in wet areas.
Planting Procedure:
- Amend the soil with organic matter as explained above.
- Dig the planting hole to a depth so the root ball will be slightly above or level with the existing soil level.
- Get on your knees near the hole for ease of positioning roots during planting. As the hole is filled lift loosened roots and extend them out onto the soil so they are planted in a horizontal position in the soil.
- Pack soil around the roots with your hands. No feet please; this will tear tender roots.
- Continue to lift and extend roots until the entire hole is filled.
- Mulch with course airy material such as pine bark, pine needles, or oak leaves.
- Water thoroughly to settle soil around roots.
- Place a burlap sun screen/wind break on the south and west sides for the first year, especially in winter.
Aftercare: Water as needed to keep the soil moist but not wet. Most plants die from improper watering; either not enough or too much.
Notes: Tender new growth normally wilts on hot afternoon. If leaves recover soon after sundown, water may not be needed. If foliage remains wilted during the cooler evening hours, water is needed. Water deeply (at least 1 inch of water) and only when needed to keep the soil moist. Hot sunny days dry soil more quickly.
For more information on rhododendrons, see H. Edward Reiley, Success with Rhododendrons and Azaleas (Revised Edition![]() , Timber Press, 2004) or the Mason-Dixon Chapter, ARS, web site at www.mdrhododendron.org.
, Timber Press, 2004) or the Mason-Dixon Chapter, ARS, web site at www.mdrhododendron.org.